To use the dr brown bottle sterilizer, fill the sterilizer with water, place the bottles and accessories inside, and press the start button. The sterilizer uses steam to kill bacteria and viruses, making bottles safe for use.
How to Use Dr Brown Bottle sterilizer?
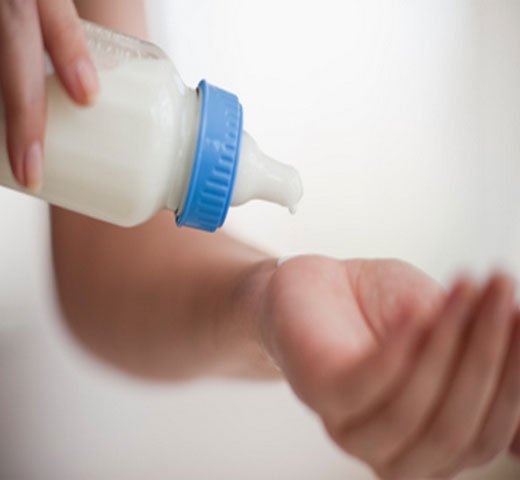
Dr brown’s bottle sterilizer is a compact and easy-to-use device that sterilizes your baby’s bottles in a matter of minutes. As a parent, it is essential to make sure that your baby’s feeding equipment is always clean and safe to use.
Dr brown’s bottle sterilizer does this job effectively by using steam to kill up to 99. 9% of bacteria and viruses. This sterilizer can hold up to six bottles and their accessories at once, making it a convenient tool for busy parents. With its simple and straightforward operation, the dr brown bottle sterilizer is a must-have for any parent who wants to ensure that their baby’s feeding equipment is always clean and safe.

Credit: www.amazon.com
Understanding The Dr Brown Bottle Sterilizer
If you’re a parent with a young baby, ensuring that their feeding equipment is clean and sterile is an essential task. One option for keeping bottles free from harmful bacteria is to use a bottle sterilizer. One of the most popular brands is the dr brown bottle sterilizer.
Here’s a breakdown of how it works, as well as its key features.
Follow The Step-By-Step Guide Line
The dr brown bottle sterilizer uses steam to kill bacteria and germs on your baby’s feeding equipment. Follow these steps to use the sterilizer:
- Fill the sterilizer’s base with water up to the marked level.
- Load the bottles, nipples, and other equipment onto the racks. Make sure that they don’t touch each other.
- Turn the sterilizer on.
- Wait for the sterilizer to complete its sterilization cycle, which usually takes around 12 minutes.
- Once the cycle is complete, unplug the sterilizer and allow it to cool down for 10 minutes before removing the equipment.

The Benefits Of A Dr Brown Bottle Sterilizer
Dr brown bottle sterilizer is one of the highly recommended products when it comes to taking care of your baby’s feeding equipment. Sterilizing your baby’s bottles is not only essential for healthy growth but also helps protect them from harmful bacteria.
Using a dr brown bottle sterilizer comes with many benefits, as outlined below in the following subheadings with key points in bullet form or plain paragraphs, adhering to markdown syntax .
Why Sterilizing Your Baby’S Bottles Is Important
• sterilizing eliminates the bacteria that can cause infections in infants.
• by sterilizing bottles, nipples, and other feeding equipment, you reduce the risk of contamination and prevent any potential illness or infection that might compromise your baby’s well-being.
• as babies’ immune systems are still developing, they are more vulnerable to illness-causing bacteria and viruses.
• consistent sterilization ensures that all the baby bottles and teats are germs-free, leaving a conducive environment for their bodies to flourish.
The Benefits Of Using Dr Brown Bottle Sterilizer
• dr brown bottle sterilizer has an effective sterilization process that kills up to 99. 9% of bacteria, ensuring that your baby’s feeding equipment is always safe and clean.
• the device sterilizes six bottles within six minutes, which saves time and energy. The sterilizer also shuts off automatically once complete, ensuring convenience for busy parents.
• dr brown bottle sterilizer is compatible with almost all the standard neck baby bottles, making it a versatile solution for all caregivers.
• the sterilizer is user-friendly and easy to use, with a one-button operation that parents can handle without technical know-how or assistance.
• using this sterilizer will ensure that all feeding equipment is kept safe and sterilized at all times, without compromise, promoting your baby’s health and well-being.
Using a dr brown bottle sterilizer is a reliable solution for keeping your baby’s feeding equipment clean and safe. The device’s fast and effective sterilization process ensures that all feeding equipment is free of germs, thereby promoting your baby’s health.
Keep in mind that sterilizing is as important as washing baby items, and a dr brown bottle sterilizer can quickly take care of this crucial task, saving you time and energy.
Key Features Of The Dr Brown Bottle Sterilizer
Here are some of the features that make the dr brown bottle sterilizer stand out from other brands:
- A large capacity, which means that you can sterilize up to 6 bottles at a time, as well as other equipment.
- Easy to use buttons with a digital display that lets you know how long is left on the cycle.
- An automatic shut-off feature that turns the sterilizer off once the cycle is complete.
- A removable tray for easy loading and unloading of equipment.
- A compact design that allows you to store it easily on a kitchen counter or in a cupboard.
Using a bottle sterilizer can help to give you peace of mind that your baby’s feeding equipment is free from harmful bacteria. The dr brown bottle sterilizer is a popular option due to its large capacity, easy-to-use features, and compact design.
So why not give it a try and see how it can make your daily routine a little easier?
Using The Dr Brown Bottle Sterilizer
Dr brown bottle sterilizer is one of the best products in the market for sterilizing baby bottles and accessories. It ensures that your baby’s feeding equipment is sanitized, free from harmful bacteria, and safe to use. In this post, we will give you a step-by-step guide to using dr brown bottle sterilizer, common mistakes to avoid while using it, and tips and tricks for using it effectively.
Step-By-Step Guide On How To Use The Dr Brown Bottle Sterilizer
Before using your dr brown bottle sterilizer, make sure all the equipment is washed and cleaned thoroughly. Here is a simple guide to using the sterilizer:
- Add clean water to the sterilizer. The sterilizer comes with a measuring cup that helps you add the right amount of water for effective sterilization.
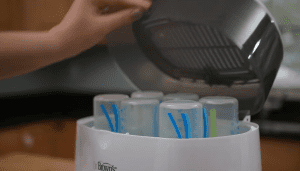
- Load the sterilizer. Arrange the bottles, nipples, caps, and other accessories inside the sterilizer. Make sure they are not placed too close to each other as this could hinder heat and steam circulation.
- Close the lid tightly. Ensure that the lid is in place and locked correctly. Otherwise, the sterilizer will not function.
- Turn on the sterilizer. Press the on/off button to start the sterilization process. The sterilizer will emit a sound indicating it has started functioning.
- Wait for the sterilization cycle to finish. The sterilization cycle takes approximately 12 minutes to complete.
- Turn off the sterilizer. Once the process is complete, press the on/off button to turn off the sterilizer.
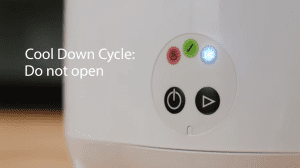
- Wait for it to cool down. The sterilizer may become hot after the process, so it is essential to give it enough time to cool down before opening it.
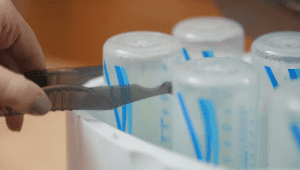
- Finally, remove the equipment from the sterilizer and place them in a clean and dry place.
Common Mistakes To Avoid While Using The Sterilizer
To ensure the sterilization process is effective, there are a few things to avoid when using dr brown bottle sterilizer.
- Avoid overloading the sterilizer. Make sure you place fewer items in the sterilizer as overloading it can cause it not to function properly.
- Do not open the sterilizer before it cools down. Opening it while it is still hot may cause burns or damage to the baby’s feeding equipment.
- Ensure the equipment is clean before sterilization. Sterilizing a dirty or contaminated feeding equipment can render the sterilization process ineffective.
Tips And Tricks For Using Dr Brown Bottle Sterilizer Effectively
To get the best out of dr brown bottle sterilizer, here are some tips and tricks you can use:
- Regular cleaning – always clean the sterilizer after use to prevent limescale buildup that may affect its effectiveness.
- Regular descaling – descaling the sterilizer helps remove limescale buildup, keeping the sterilizer functioning efficiently.
- Use purified water – using purified water instead of tap water helps reduce limescale buildup and ensures effective sterilization.
- Regular checks – regularly inspect the sterilizer for any signs of damage or wear. Damaged sterilizers may not function effectively, leading to ineffective sterilization.
Dr brown bottle sterilizer is an essential tool for ensuring that your baby’s feeding equipment is sterilized, safe, and free from harmful bacteria. By following the step-by-step guide to using it, avoiding common mistakes, and using tips and tricks to make it effectively, you can guarantee the safety and well-being of your baby.
Cleaning And Maintaining Your Dr Brown Bottle Sterilizer
Using dr. brown bottle sterilizers can make bottle-feeding an enjoyable and stress-free experience for new parents. In this post, we will focus on how to clean and maintain your dr. brown bottle sterilizer. Follow a few simple tips to ensure that your bottle sterilizer works efficiently and lasts for a long time.
Cleaning The Sterilizer
Cleaning your dr. brown’s bottle sterilizer is not a difficult job, but it requires routine cleaning to ensure its optimal performance. Here are some key points to consider when cleaning your sterilizer:
- Start by unplugging the sterilizer, and letting it cool down before handling it.
- Wipe the sterilizer with a damp cloth after each use to ensure there are no remains of formula or water left inside the sterilizer.
- Use a soft-bristled brush to remove any stubborn stains inside the sterilizer or on the heating plate.
- The sterilizer must frequently be washed with soap and water, then rinsed and let air dry before being used again.
Proper Maintenance Of The Sterilizer
Proper maintenance of your dr. brown bottle sterilizer enhances its performance and long-lasting use. Here are some tips to ensure your sterilizer works at its best:
- Do not overfill the sterilizer, as this can damage it. Follow the manufacturer’s guidelines about the maximum number of bottles that can be sterilized per cycle.
- Always ensure the heating plate is clean and does not have any hard deposits, which can impact the sterilizer’s efficiency.
- Check the sterilizer’s manual on how often it requires descaling and carry out the process regularly.
- Store your sterilizer in a dry, clean, and safe place in between use.
Troubleshooting Common Issues With The Sterilizer
Like any other electronic device, dr. brown bottle sterilizers may have some common issues. Here are some simple solutions to some of these issues:
- In case the sterilizer does not heat up, check if it is properly connected to a power source and plugged into the socket. If the problem persists, reach out to the manufacturer for assistance.
- If the steam does not seem hot enough, try cleaning the heating plate with soapy water and a brush.
- If there is mineral build-up in the heating plate, descale it following the instructions in the manual.
- If you notice any discoloration in the sterilizer, clean it with vinegar or baking soda following the manual’s guidelines.
Keeping your dr. brown bottle sterilizer clean and well-maintained is important for efficient working and a longer lifespan. With these easy tips, you can ensure that your sterilizer operates smoothly and safely, so that you and your baby can enjoy all the benefits of clean and sterilized bottles.
Frequently Asked Questions On How To Use Dr Brown Bottle Sterilizer
How Do I Use Dr Brown Bottle Sterilizer?
To use dr brown bottle sterilizer, first wash the bottles thoroughly, add water to the sterilizer and turn on the machine for a complete sterilization cycle. Once sterilized, allow the bottles to cool down, and assemble them before use.
Can Dr Brown Bottle Sterilizer Accommodate Other Brand’S Bottles?
Dr brown bottle sterilizer is uniquely designed to accommodate all dr brown bottles. However, some other brands might fit depending on their design and size. It’s better to check the manufacturer’s manual before use.
How Long Does Dr Brown Bottle Sterilizer Take To Sterilize The Bottles?
Dr brown bottle sterilizer takes around 12 minutes to sterilize six bottles and other accessories. It offers a one-button cycle that automatically closes the sterilizer and powers off once the sterilization process is complete.
How Do I Clean Dr Brown Bottle Sterilizer?
Cleaning dr brown bottle sterilizer is easy. After every use, wipe it down with a clean and damp cloth. Once a week, clean the sterilizer with warm soapy water and rinse it thoroughly then dry it and store it in a cool, dry place.
Can Dr Brown Bottle Sterilizer Be Used For Breast Pump Accessories?
Yes, dr brown bottle sterilizer can be used to sterilize breast pump accessories such as breast shields, collection containers, and small breast pump parts. However, check the manufacturer’s manual for effective usage.
Key Takeaways: How to Use Dr Brown Bottle Sterilizer
After going through the above guide of how to use dr brown bottle sterilizer, it’s clear that this particular sterilizer is an incredible device that has a lot to offer. It is undoubtedly a practical solution for keeping your baby’s bottles clean and healthy, and with the user-friendly functions, it’s a simple device to work with.
The ease of use, combined with the benefits of a sterilized bottle, makes it an essential investment for every parent with a newborn or young child. It’s worthwhile noting that although proper sterilization helps to eliminate germs and bacteria, it is not a substitute for thorough and regular cleaning.
You still need to clean the bottle and nipples by hand or using a dishwasher to ensure they are clean before sterilization. Dr brown bottle sterilizer is an excellent device to help new parents keep their baby’s bottles safe and clean.
By following the above steps correctly, you’ll have no trouble using the sterilizer, and your baby can enjoy their meals without any issues.